There’s a certain calmness that fills the kitchen while preparing a familiar favorite. With smooth, zesty filling resting atop a tender base, gluten-free lemon bars can make the simplest of evenings feel special. Whether you’re winding down after a busy day or enjoying a quiet afternoon, these bars are perfect for sharing at casual gatherings, family meals, or even sneaking a slice just for yourself. The comforting balance of sweet and tart draws you in, creating a moment of simplicity that every cook appreciates.
Inviting you to step into this recipe, let’s craft some delightful lemon bars.
Why You’ll Love This Gluten-Free Lemon Bars recipe easy
These gluten-free lemon bars are not only easy to make, but they also deliver a comforting blend of sweet and tart flavors. With a rich, smooth texture, they offer practical everyday value, whether for breakfast or an afternoon snack. There’s something wonderfully satisfying about creating a treat that is reliable and comforting, making them a delightful choice for any moment.
Kitchen Tools You’ll Need
- Mixing bowls
- Whisk
- Spatula
- Baking dish
- Sifter or fine mesh strainer
Ingredients
- ¾ cup + 2 tablespoons super-fine blanched almond flour (light texture)
- ¼ cup + 1 tablespoon sweet rice flour (adds moisture)
- 2 tablespoons cornstarch (thickening agent)
- ¼ cup granulated sugar (sweetness)
- ¼ teaspoon kosher salt (enhances flavor)
- ⅓ cup plant butter or refined coconut oil (richness)
- ¾ teaspoon pure vanilla extract (aroma)
- 1¼ cups granulated sugar (main sweetness)
- ¼ cup cornstarch (thickening purpose)
- 1 cup fresh lemon juice (tartness)
- 1 cup full fat canned coconut milk (creamy texture)
- ¼ teaspoon kosher salt (flavor balance)
- ¼ teaspoon turmeric (color)
- 1 tablespoon lemon zest (additional lemon flavor)
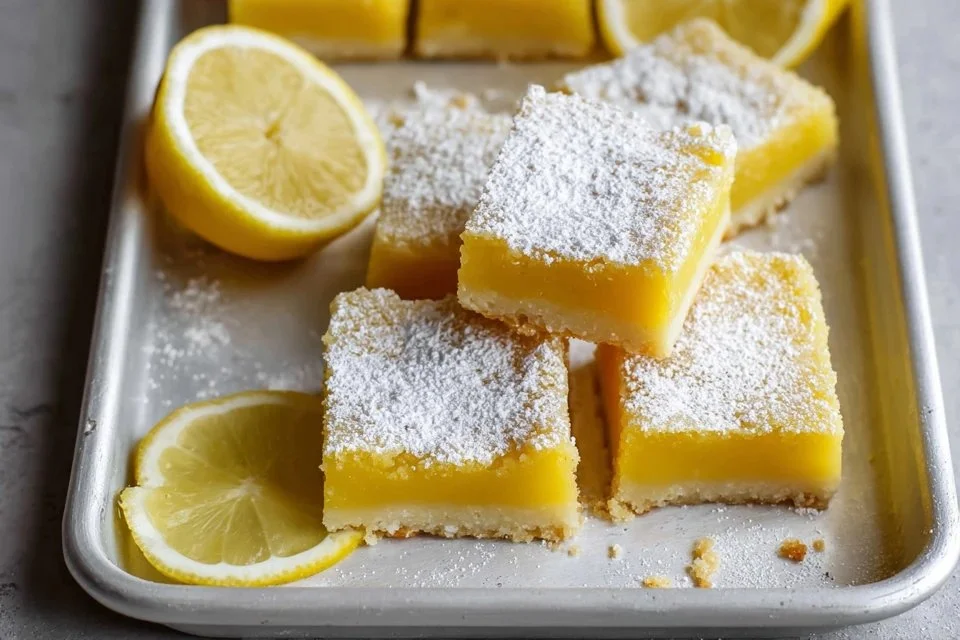
- Powdered sugar for serving (finishing touch)
- Lemon slices for serving (garnish)
How to Make Gluten-Free Lemon Bars recipe easy
Step 1. Begin by preheating your oven to the proper setting, ensuring it achieves a consistent temperature. This will create an ideal environment for your lemon bars to bake evenly.
Step 2. In a mixing bowl, combine the super-fine blanched almond flour, sweet rice flour, cornstarch, granulated sugar, and kosher salt. Use a whisk to blend these dry ingredients together until they are thoroughly mixed, which helps ensure a uniform texture.
Step 3. To the combined dry ingredients, add the plant butter or refined coconut oil and vanilla extract. Blend these together until the mixture becomes somewhat crumbly and holds together when pressed. This indicates that the base is ready for the pan.
Step 4. Gently press the mixture into a prepared baking dish, making sure it forms an even layer across the bottom. This is crucial, as it will set the foundation for your lemon filling.
Step 5. Place the prepared dish into the oven and bake until the base is lightly golden. This step seals the crust and gives it the right amount of sturdiness before adding the filling.
Step 6. While the crust bakes, prepare the filling by whisking together the granulated sugar and cornstarch in a separate bowl. This helps to eliminate any lumps, ensuring that your filling remains smooth and creamy.
Step 7. Add the fresh lemon juice, full-fat coconut milk, kosher salt, turmeric, lemon zest, and whisk until all the ingredients are well combined. The mixture should be smooth with a vibrant yellow hue, reflecting the lemon’s brightness.
Step 8. Once the crust has finished baking and is just slightly cool, pour the lemon filling evenly over the top, spreading it out gently to cover the entire surface. The filling will meld beautifully with the base as it bakes.
Step 9. Return the dish to the oven and bake until the filling is set. You’ll want to look for a slight jiggle in the center, which indicates that it’s done, while ensuring the edges are no longer liquid.
Step 10. After baking, remove the dish from the oven and let it cool completely at room temperature. This cooling will help the filling firm up a bit more before slicing.
Step 11. Once cool, refrigerate the lemon bars for a while. This step not only helps to set them better but also allows the flavors to develop a little further.
Step 12. Finally, when you’re ready to serve, dust the tops with powdered sugar and garnish with lemon slices. The powdered sugar will add a touch of sweetness while the lemon slices enhance the aesthetic.

Serving Suggestions
These gluten-free lemon bars can serve a variety of purposes. They’re delightful for breakfast alongside your morning coffee or tea, providing a sweet yet tart start to the day. They also make for a wonderful snack, whether you’re enjoying them alone or with loved ones. If you have any leftovers, they store well in the fridge, allowing you to enjoy them as a simple dessert option during family meals or as a refreshing treat when the craving strikes.
Pro Tips for Best Results
- Ensure the crust is appropriately baked and slightly golden before adding the filling to achieve the right texture.
- Chill your lemon bars thoroughly before slicing for cleaner edges.
- If you prefer a sweeter taste, feel free to adjust the amount of granulated sugar in the filling.
- Make sure to zest the lemons before juicing them to capture the fragrant oils.
- Use fresh lemons for the best flavor; bottled juice can alter the taste.
- Keep an eye on the bars while they bake to avoid overcooking, which could lead to a tough filling.
Common Mistakes to Avoid
- Overmixing the crust: This can make the crust tough. Mix until just combined to maintain a tender texture.
- Not cooling the crust before adding the filling: If the crust is too warm, the filling might slide around, affecting the final layer.
- Inaccurate measuring of lemon juice: Too much juice can lead to a runny filling, while too little can make it less flavorful. Use measuring tools for accuracy.
- Skipping the chilling step: If you cut the bars too soon, they may not hold their shape well. Give them time to set in the fridge.
- Using low-fat coconut milk: It could result in a thinner filling. Full-fat provides richness and creaminess for better texture.
- Not using fresh lemons: Bottled lemon juice often lacks the bright flavor and aroma of fresh juice, which can affect the overall taste.
Variations & Substitutions
You can add a touch of flavor by incorporating fresh herbs like mint or basil to the lemon filling for a refreshing twist. Another option is to swap the lemon juice with lime juice for a different citrus experience. If you prefer a less sweet version, reduce the amount of sugar in the filling. Additionally, consider adding a layer of raspberry or blueberry jam under the lemon filling for a fruity surprise.
Storage & Reheating
Store any leftovers at room temperature if consumed within a day, but for longer freshness, refrigerate them in an airtight container. These lemon bars will last up to five days in the fridge. If you wish to freeze them, wrap individual bars in plastic wrap and place them in a freezer-safe bag. To reheat, let them thaw in the fridge overnight, and then serve at room temperature for the best texture.
Frequently Asked Questions
Can I make this recipe ahead of time?
Absolutely! These lemon bars can be made a day in advance, allowing time for the flavors to deepen and for the filling to set properly. Just remember to store them in the refrigerator to keep them fresh.
How long does it last in the fridge?
When stored in the fridge, gluten-free lemon bars can last about five days. Make sure to keep them in an airtight container to maintain freshness.
Can I freeze this recipe?
Yes, you can freeze lemon bars. Wrap them tightly in plastic wrap and place them in a freezer-safe container. They should last up to three months in the freezer.
What can I substitute for one ingredient?
If you’re out of sweet rice flour, you can use a similar gluten-free flour blend; however, the texture may differ slightly. Just ensure it’s a fine mix to create a softer crust.
Why didn’t my recipe turn out as expected?
There could be several reasons, such as incorrect measurements, not allowing the bars to cool properly before slicing, or using a different type of flour. It’s best to follow the recipe closely for the best results.
Final Thoughts
Making gluten-free lemon bars is a fulfilling experience, blending simple ingredients into something that brings comfort and joy. The process not only yields a satisfying treat but also offers a chance to create moments around the table. Sharing these bars with friends or family can bring a delightful touch to any occasion. Embrace the process and enjoy the warmth it brings to your kitchen, knowing that each bite carries a piece of simple goodness.

Gluten-Free Lemon Bars
Ingredients
For the crust
- ¾ cup super-fine blanched almond flour light texture
- ¼ cup sweet rice flour adds moisture
- 2 tablespoons cornstarch thickening agent
- ¼ cup granulated sugar sweetness
- ¼ teaspoon kosher salt enhances flavor
- ⅓ cup plant butter or refined coconut oil richness
- ¾ teaspoon pure vanilla extract aroma
For the filling
- 1¼ cups granulated sugar main sweetness
- ¼ cup cornstarch thickening purpose
- 1 cup fresh lemon juice tartness
- 1 cup full fat canned coconut milk creamy texture
- ¼ teaspoon kosher salt flavor balance
- ¼ teaspoon turmeric color
- 1 tablespoon lemon zest additional lemon flavor
For serving
- to taste powdered sugar for serving (finishing touch)
- as needed lemon slices for garnish
Instructions
Preparation
- Preheat your oven to the proper temperature.
- In a mixing bowl, combine the super-fine blanched almond flour, sweet rice flour, cornstarch, granulated sugar, and kosher salt. Whisk until thoroughly mixed.
- Add plant butter or refined coconut oil and vanilla extract. Blend until crumbly.
- Press the mixture into a prepared baking dish evenly.
- Bake the crust until lightly golden.
Making the Filling
- In a separate bowl, whisk together the granulated sugar and cornstarch.
- Add lemon juice, full-fat coconut milk, kosher salt, turmeric, and lemon zest. Whisk until smooth.
Baking and Cooling
- Once the crust is slightly cool, pour the lemon filling over it.
- Return to the oven and bake until the filling is set.
- Remove from oven and let cool completely, then refrigerate before slicing.
- Dust with powdered sugar and garnish with lemon slices before serving.


