Creating a bright, lemony treat can truly brighten any day. These lemon bars are a delightful combination of sweet and tart, making them perfect for any occasion—from casual weeknight desserts to weekend gatherings and quiet afternoons when you need a little something special. The process is straightforward, allowing you to enjoy the comforting aroma of fresh lemons wafting through your kitchen. Let’s explore this lovely recipe together.
Why You’ll Love This Pioneer Woman Lemon Bars
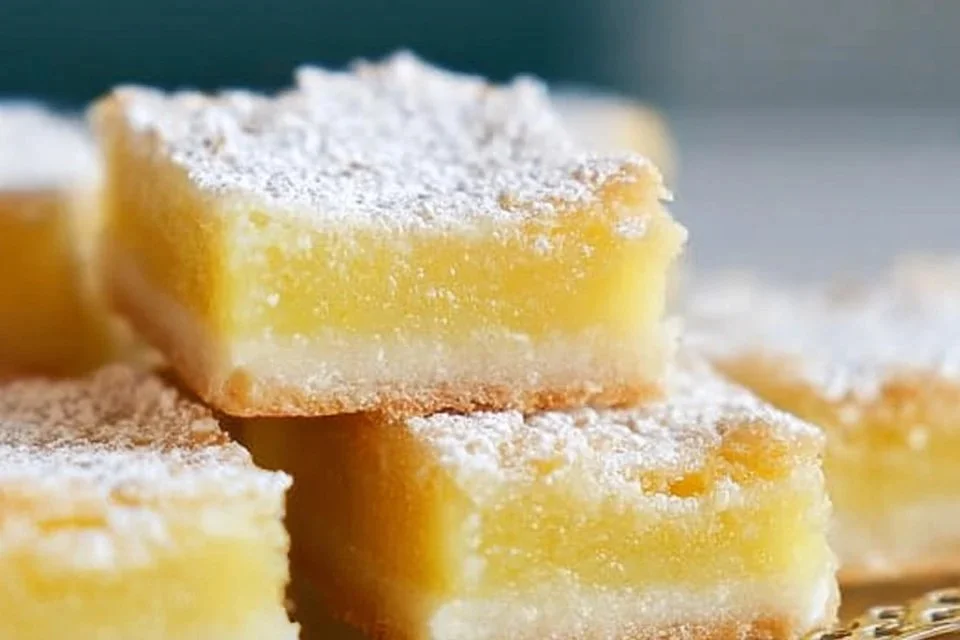
This recipe is easy to prepare and yields consistent results, making it a dependable choice for your baking lineup. The smooth, creamy lemon filling sits atop a buttery crust, offering a delightful balance of flavors that brings comfort with each bite. Pioneer Woman Lemon Bars are practical enough for everyday sweet cravings while still feeling special enough for gatherings.
Kitchen Tools You’ll Need
- Baking pan (9×13)
- Mixing bowl
- Whisk
- Measuring cups
- Measuring spoons
- Sifter
Ingredients
- 2 cups Flour (provides structure)
- 1/2 cup Sugar (adds sweetness)
- 1/4 teaspoon salt (enhances flavor)
- 2 sticks (1 Cup) Salted Butter, Cut Into Small Cubes (adds richness)
- 1-1/2 cup Sugar (sweetens the filling)
- 1/4 cup Flour (thickens the filling)
- 4 whole Large Eggs (binds the filling)
- Zest And Juice Of 4 Medium-sized Lemons — about 1 cup of lemon juice (adds tartness and flavor)
- Powdered Sugar, For Sifting (for finishing touch)
How to Make Pioneer Woman Lemon Bars
Step 1. Begin by preheating your oven to 350°F. Preheating ensures that your lemon bars bake evenly and achieve the right texture. It’s a simple but crucial step that lays the foundation for perfectly baked bars.
Step 2. In a mixing bowl, combine the flour, sugar, and salt. Whisk the dry ingredients together until blended well. This helps to evenly distribute the sugar and salt, ensuring that there are no clumps and allowing for a well-mixed crust.
Step 3. Add the cubed salted butter to the flour mixture. Using a pastry cutter or your fingers, mix until the mixture resembles coarse crumbs. This step is important as it creates a sandy texture that will form the flaky crust.
Step 4. Press the crumbly mixture evenly into the bottom of a greased 9×13-inch baking pan. Ensure it’s packed down firmly. This creates a solid base for your lemon bars that will hold together nicely after baking.
Step 5. Bake the crust in the preheated oven for about 20 minutes, or until the edges are lightly golden. You’ll know it’s ready when you see subtle browning around the edges, which signals that the crust has baked through.
Step 6. While the crust is baking, prepare the lemon filling. In another mixing bowl, whisk together the sugar and flour. This combines them before adding the eggs, helping to avoid clumps in the filling mixture.
Step 7. Add the large eggs to the sugar and flour mixture. Whisk them in until the mixture is smooth and pale. This incorporates air into the eggs, which will help create a light texture in the filling once baked.
Step 8. Next, add the lemon zest and lemon juice to the egg mixture. Stir until everything is well combined. The zest adds a vibrant, aromatic quality, while the juice contributes that signature tanginess to the filling.
Step 9. Pour the lemon filling over the pre-baked crust, spreading it gently. The filling should cover the crust evenly, allowing it to bake into the base as it sets.
Step 10. Bake the lemon bars for an additional 20-25 minutes. You’ll know they’re done when the filling is set but still has a slight jiggle in the center. This means the bars will have a creamy texture when cooled.
Step 11. Once baked, remove the lemon bars from the oven and allow them to cool in the pan. Letting them cool completely will help them set, making them easier to cut into neat squares later.
Step 12. Once cooled, sift powdered sugar over the top for a finishing touch. This adds a hint of sweetness and gives the bars an appealing look.
Serving Suggestions
These lemon bars are wonderfully versatile and can be enjoyed in various ways. Serve them for breakfast alongside your morning coffee or tea, offering a refreshing start to your day. They also make for a delightful afternoon snack, perfectly complementing a quiet moment with a book or chat with friends. For family meals, these bars can provide a sweet ending that everyone will appreciate. If there are any leftovers, they keep well in the refrigerator for a sweet treat later in the week.
Pro Tips for Best Results
- Ensure your butter is cold when mixing it into the crust to achieve a flakier texture.
- Sift the powdered sugar right before serving for the best presentation and to prevent clumping.
- Use fresh lemons for the best flavor; the zest and juice provide a bright, aromatic quality.
- Let the bars cool completely before cutting to achieve clean edges.
- Use a sharp knife, and for cleaner cuts, wipe it between slices.
Common Mistakes to Avoid
- Using room temperature butter: This may lead to a dense crust. Cold butter is key for flakiness, so stick to small cubes from the fridge.
- Overmixing the crust: Mixing too much can make the crust tough. Stop when you reach a crumbly texture.
- Skipping the cooling step: Cutting the bars while they’re still warm can cause them to fall apart. Patience ensures neat squares.
- Not baking the crust long enough: Underbaking may result in a soggy bottom. Look for a light golden edge to know when to remove it.
- Using bottled lemon juice: Freshly squeezed juice yields the best flavor. Bottled juice lacks the zing of fresh lemons.
- Overbaking the filling: If baked too long, the filling may become rubbery. Keep an eye on it for a slight jiggle as it cools.
Variations & Substitutions
If you’re looking to experiment, consider adding a pinch of ginger or cardamom for a different flavor profile. You might also try swapping in different citrus juices like lime or orange for a unique twist, but keep the lemon’s bright character in mind. Experimenting with a crumb topping made of crushed nuts and brown sugar could also enhance texture and flavor.
Storage & Reheating
Store your lemon bars at room temperature for a day if covered. If you have leftovers, they can be kept in the refrigerator for up to a week. For optimal freshness, you can freeze the lemon bars, wrapped tightly in plastic wrap and then foil. To reheat, simply thaw at room temperature for a few hours or unwrap and warm them slightly in the microwave until just warmed through. This maintains their texture without overcooking.
Nutrition Information
Nutrition information is not available.
Frequently Asked Questions
Can I make this recipe ahead of time?
Yes, these lemon bars can be made a day ahead. Just store them in the refrigerator once cooled to help them set and maintain freshness.
How long does it last in the fridge?
When stored properly, lemon bars can last up to one week in the fridge. Just make sure they are covered to prevent them from drying out.
Can I freeze this recipe?
Absolutely, lemon bars freeze well. Wrap them tightly in plastic wrap and foil to keep them fresh in the freezer for up to three months.
What can I substitute for one ingredient?
If you run out of powdered sugar, you can use granulated sugar instead for the topping, but it will not be as fine and may not create the same effect.
Why didn’t my recipe turn out as expected?
Common issues often arise from ingredient temperatures, baking times, or measurements. Double-checking these details can often resolve the problem.
Final Thoughts
Making these lemon bars brings a sense of satisfaction, blending simplicity and deliciousness in every step. Enjoy the hands-on process and delight in the fresh, vibrant flavors that emerge. Share them with loved ones or savor them on your own; the comfort they bring is undeniable. With a little time in the kitchen, you can create a treat that is beloved by many. Happy baking!

Lemon Bars
Ingredients
For the crust
- 2 cups Flour provides structure
- 1/2 cup Sugar adds sweetness
- 1/4 teaspoon Salt enhances flavor
- 2 sticks Salted Butter, Cut Into Small Cubes adds richness
For the filling
- 1 1/2 cups Sugar sweetens the filling
- 1/4 cup Flour thickens the filling
- 4 whole Large Eggs binds the filling
- Zest And Juice Of 4 medium-sized lemons about 1 cup of lemon juice adds tartness and flavor
Instructions
Preparation
- Preheat your oven to 350°F.
- In a mixing bowl, combine the flour, sugar, and salt. Whisk until blended.
- Add the cubed salted butter to the mixture. Mix until it resembles coarse crumbs.
- Press the mixture evenly into the bottom of a greased 9x13-inch baking pan.
- Bake the crust for about 20 minutes or until the edges are lightly golden.
Filling Preparation
- In another mixing bowl, whisk together the sugar and flour.
- Add the eggs and whisk until smooth and pale.
- Add the lemon zest and juice to the egg mixture and stir until combined.
- Pour the lemon filling over the pre-baked crust, spreading it gently.
- Bake for an additional 20-25 minutes until the filling is set but jiggles slightly in the center.
Finishing
- Allow the lemon bars to cool in the pan.
- Sift powdered sugar over the top before serving.


