Why You’ll Love This Recipe
You’ll appreciate the ease and reliability of this recipe, making it a go-to choice for a quick treat. With a balanced flavor profile, it combines chocolate richness with protein to satisfy hunger. The Two Minute Protein Brownie fits seamlessly into everyday life, providing a simple way to enjoy a delicious dessert while staying aligned with your dietary goals.
Kitchen Tools You’ll Need
- Microwave-safe mug or bowl
- Spoon for mixing
- Measuring spoons
Ingredients
- 1 egg (for moisture and structure)
- 1/3 cup Greek yogurt (adds creaminess and protein)
- 1 tbsp sweetener of choice (for sweetness)
- 3 tbsp cocoa powder (for chocolate flavor)
- 1 tbsp chocolate protein powder (for additional protein)
- Chocolate chips (adds richness and indulgence)
How to Make Two Minute Protein Brownie
Step 1
Start by cracking the egg into a microwave-safe mug or bowl. Use a fork or whisk to beat the egg until the yolk and white are fully combined and slightly frothy. This incorporates air which helps the brownie rise. Make sure there are no egg whites or yolks left untouched, as this can lead to uneven cooking. Once thoroughly mixed, you’re ready for the next ingredient.
Step 2
Next, add the Greek yogurt to the beaten egg. This ingredient will contribute moisture and creaminess to the brownie, creating a tender texture. Stir the mixture well until both the egg and Greek yogurt are thoroughly combined and there are no lumps remaining. The yogurt should meld smoothly into the egg for an even batter.
Step 3
Now, add your chosen sweetener to the yogurt and egg mixture. Depending on your preference—granulated sugar, honey, or a sugar substitute—this will enhance the flavor of the brownie. Mix until the sweetener is completely dissolved and all the components are integrated, ensuring a uniformly sweet taste throughout the brownie.
Step 4
Incorporate the cocoa powder into the batter next. This ingredient is essential for yielding a rich chocolate flavor. Use your spoon to mix it in well, as dry cocoa can clump together. Stir until the cocoa is evenly distributed and the mixture darkens in color, revealing a luscious chocolatey base.
Step 5
Afterward, add the chocolate protein powder to the mixture. This will increase the protein content of your brownie, making it a more nutritious snack. Make sure to blend it in thoroughly so the protein powder is fully combined. This step will also enhance the chocolate taste, complementing the cocoa powder you’ve just mixed in.
Step 6
Now it’s time to fold in the chocolate chips. Add as many as you prefer for a delightful burst of chocolate throughout your brownie. Gently stir the chocolate chips into the batter, ensuring they’re evenly distributed without overmixing, which might toughen the brownie. Once incorporated, the batter will have a lovely texture with pockets of melted chocolate.
Step 7
Transfer the mixture to a microwave-safe mug if you haven’t already. Be careful to smooth the top for even cooking. Ensure there’s some space at the top of the mug to allow the brownie to rise during cooking. At this point, your brownie batter is ready for the microwave.
Step 8
Finally, microwave the brownie on high power for about one minute. Watch for the brownie to rise and firm up, but be careful not to overcook it, as this can make the brownie dry. Once the time is up, let it sit for a minute to finish setting. It should be slightly gooey in the center for the best texture. Enjoy!
Serving Suggestions
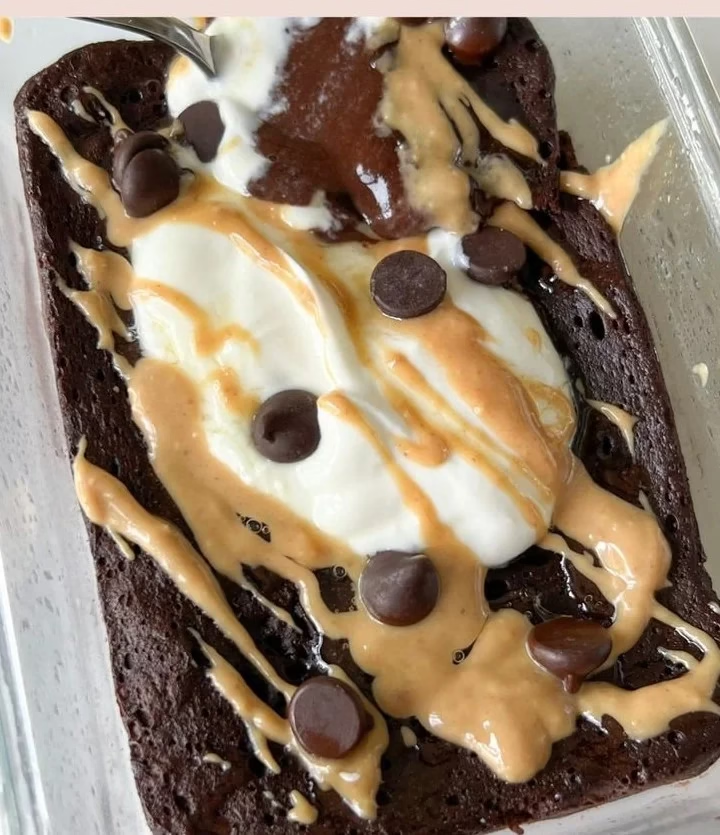
This brownie is versatile; you can enjoy it as a quick breakfast, an afternoon snack, or even a post-dinner treat. Serve it warm, perhaps with a dollop of yogurt or a drizzle of nut butter for added flavor and creaminess. It also works well as a dessert option during family meals, satisfying sweet cravings without the guilt. If you have leftovers, they can be enjoyed the next day, making it a practical choice for busy schedules.
Pro Tips for Best Results
- Use fresh ingredients for the best flavor and texture.
- Ensure the mug is large enough to prevent overflow during cooking.
- Adjust the cooking time based on your microwave’s wattage for consistent results.
- Use a fork to thoroughly mix the batter, avoiding clumps.
- Allow the brownie to cool slightly after microwaving before digging in.
- Customize with different flavors of protein powder for variety.
Common Mistakes to Avoid
- Not mixing thoroughly – If the batter is not mixed well, you may end up with uneven sweetness or texture. Be sure to blend until smooth.
- Overcooking – Microwaves vary, and cooking too long can lead to a dry brownie. Start with one minute, and check for doneness.
- Underestimating mug size – Using a small mug can lead to batter overflow. Choose a bigger mug or bowl for proper space during cooking.
- Skipping the rest period – Letting the brownie sit after microwaving allows it to finish cooking and enhances texture. Skipping this step may make it gooey.
- Using expired ingredients – Check ingredient freshness, especially with baking items. Expired ingredients can affect flavor and rise.
- Ignoring portion size – This recipe is meant for a single serving, and doubling it can lead to improper cooking. Stick to the specified amounts for best outcomes.
Variations & Substitutions
- Add nuts or seeds for extra crunch and nutrition.
- Incorporate a dash of vanilla extract for added flavor depth.
- Experiment with different types of sweeteners to adjust to your taste.
- Mix in spices like cinnamon for a unique twist.
- Top with fresh fruit or a dollop of nut butter for extra indulgence.
Storage & Reheating
Store any leftovers at room temperature for up to a day. If you need to keep it longer, place it in the refrigerator for up to three days. For longer storage, the brownie can be frozen for a month. When reheating, use the microwave for about 15-20 seconds to maintain its moist texture. Let it sit for a moment before enjoying once more.
Nutrition Information
Nutrition values are estimates and may vary based on ingredients used.
Frequently Asked Questions
- Can I make this recipe ahead of time?
- Yes, you can prepare the batter and store it in the refrigerator for a short time. However, it’s best to cook it fresh for optimal texture and moisture.
- How long does it last in the fridge?
- The brownie lasts about three days when stored properly in the refrigerator. Keep it in an airtight container for best results.
- Can I freeze this recipe?
- Absolutely! After cooling completely, wrap the brownie tightly in plastic wrap and place it in a freezer bag. It can last up to a month in the freezer.
- What can I substitute for one ingredient?
- If you’re out of Greek yogurt, you can use regular yogurt or applesauce for moisture, though this may alter the flavor slightly.
- Why didn’t my recipe turn out as expected?
- Check ingredient proportions and ensure thorough mixing. Variability in microwaves can also impact cooking time; adjust as needed for your appliance.
Final Thoughts
Making the Two Minute Protein Brownie is a straightforward and satisfying experience. With just a few steps, you can enjoy a warm, delicious treat that fits into your day effortlessly. It’s a comforting option whether you’re looking to indulge in a quick dessert or boost your day with some protein. This simple recipe allows for creativity and enjoyment—the perfect quick fix for those sweet cravings.
Two Minute Protein Brownie
Ingredients
Main Ingredients
- 1 egg for moisture and structure
- 1/3 cup Greek yogurt adds creaminess and protein
- 1 tbsp sweetener of choice for sweetness
- 3 tbsp cocoa powder for chocolate flavor
- 1 tbsp chocolate protein powder for additional protein
- chocolate chips adds richness and indulgence
Instructions
Preparation
- Start by cracking the egg into a microwave-safe mug or bowl. Use a fork or whisk to beat the egg until the yolk and white are fully combined and slightly frothy.
- Add the Greek yogurt to the beaten egg and stir well until thoroughly combined and smooth.
- Incorporate your chosen sweetener into the mixture and mix until well blended.
- Add the cocoa powder, mixing until evenly distributed.
- Fold in the chocolate protein powder, ensuring it's completely combined.
- Gently stir in the chocolate chips, distributing them evenly in the batter.
Cooking
- Transfer the mixture to a microwave-safe mug if not already done, smoothing the top for even cooking.
- Microwave the brownie on high for about one minute, then let it sit for a minute after cooking.


