
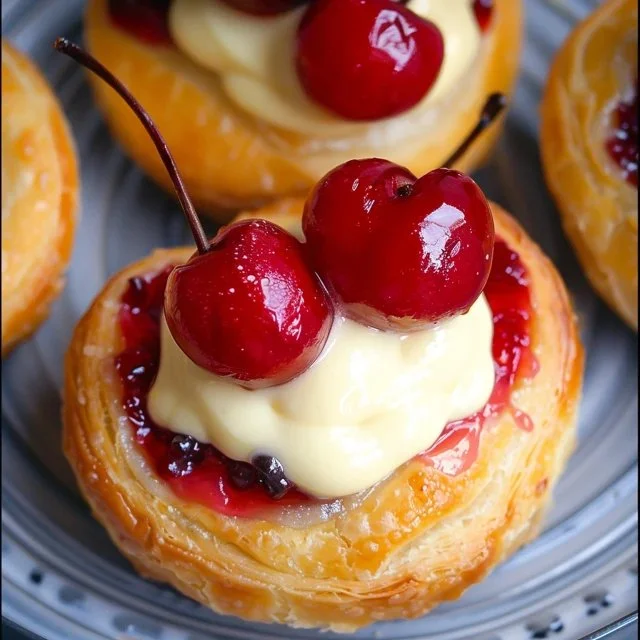
There’s something comforting about making a simple pastry filled with creamy cheese and sweet cherries. This Cherry Cheese Danish is ideal for any occasion, whether you’re winding down after a busy day, enjoying a leisurely weekend morning, or sharing at a gathering. Its combination of flaky puff pastry and rich filling makes it a treat that balances elegance with homey comfort. The straightforward steps make it accessible, inviting you to try this delicious recipe in your own kitchen.
Why You’ll Love This Recipe Cherry Cheese Danish
This recipe highlights ease and reliability, making it a wonderful choice for both novices and seasoned cooks. The creamy cheese filling pairs beautifully with the tangy cherry flavor, creating a balanced taste that’s both comforting and satisfying. Its practical nature means you can enjoy this Cherry Cheese Danish at breakfast, snack time, or even for a light dessert, making it a versatile addition to your recipe repertoire.
Kitchen Tools You’ll Need
- Baking sheet
- Mixing bowl
- Whisk
- Rolling pin
- Knife
Ingredients
- 4 oz Cream Cheese, softened (provides creaminess)
- 1/4 cup Sugar (adds sweetness)
- 1 Egg Yolk (binds ingredients together)
- 1 tablespoon Ricotta Cheese (adds richness)
- 1/2 teaspoon Almond Extract or vanilla extract (adds flavor)
- Salt, pinch (enhances flavor)
- 1/2 tablespoon Lemon Zest (adds brightness)
- 2 sheets Puff Pastry (1 box) (provides flaky texture)
- 1 can Cherry Pie Filling (adds sweetness and moisture)
- 1 large Egg plus 1 tablespoon of water (for egg wash)
- Flour for dusting (prevents sticking)

How to Make Cherry Cheese Danish
Step 1. In a mixing bowl, combine the softened cream cheese, sugar, and egg yolk. Use a whisk to blend the ingredients thoroughly until smooth and creamy. You want to ensure that there are no lumps, as this will create a uniform texture in the filling. A well-mixed cream cheese mixture will provide a rich base for your Danish.
Step 2. Add the ricotta cheese, almond or vanilla extract, pinch of salt, and lemon zest to the cream cheese mixture. Stir gently until everything is well incorporated. The ricotta will contribute to a creamy texture, and the lemon zest will brighten the overall flavor. This mixture should now be smooth and slightly fluffy.
Step 3. Preheat your oven to 400°F (if applicable). While it heats, prepare your work surface by dusting it lightly with flour. This will prevent the puff pastry from sticking and make rolling out easier. Keep an eye on the flour application — just a light dusting will suffice.
Step 4. Unroll the puff pastry sheets on the floured surface, rolling them out gently if necessary to smooth any creases. You’re looking for even thickness to ensure that the pastries bake uniformly. The pastry should have a light, flaky feel when you touch it.
Step 5. Cut each sheet of puff pastry into squares. Aim for roughly 4×4 inch squares, but don’t worry about it being perfect. As you cut, keep an eye on the size: too small may not hold the filling well, while too large can make handling difficult.
Step 6. Place a generous spoonful of the cream cheese mixture in the center of each pastry square. Be careful not to overfill them, as this can cause spills during baking. The filling should sit comfortably without overflowing over the edges.
Step 7. Put a spoonful of cherry pie filling on top of the cream cheese mixture in each pastry. This will add sweetness and moisture, rounding out the flavor. Watch for an even distribution, ensuring each Danish gets a good amount of the cherry topping.
Step 8. Fold the corners of each pastry square toward the center and pinch them to seal. This creates a little package that will keep the filling inside as it bakes. Make sure that the edges are well-closed, so the filling doesn’t leak out during baking.
Step 9. Beat the large egg with 1 tablespoon of water in a small bowl to create an egg wash. This will give your pastries a beautiful golden color. Lightly brush the egg wash over the tops of the folded pastries, making sure to cover them evenly for a nice finish.
Step 10. Carefully place the filled pastries on a baking sheet lined with parchment paper. Ensure there’s space between each pastry for even baking. When you place them, they should feel stable and secure, not sliding around the sheet.
Step 11. Bake the pastries in your preheated oven until they are puffed and golden brown. This typically requires a watchful eye; you want to see that flaky exterior becoming golden and crisp. The final texture should be flaky and delightful.
Step 12. Remove the baking sheet from the oven and let the pastries cool for a few minutes. This waiting period allows the filling to set and be more manageable when serving. The slight cooling will also enhance the eating experience, as you can enjoy the warm but not scalding pastries.

Serving Suggestions
These Cherry Cheese Danish are versatile and can be served in many casual settings. They make a delightful addition to breakfast tables, offering a sweet start to the day. As snacks, they pair well with coffee or tea and can be enjoyed at any time. They’re also suitable for family meals or potluck gatherings, ensuring you have a crowd-pleasing option. For quick fixes, leftovers can be warmed in the oven or enjoyed cold.
Pro Tips for Best Results
- Ensure cream cheese is softened for easy mixing.
- Use fresh lemon zest for the best flavor.
- Don’t overfill the pastries to prevent spilling during baking.
- Keep an eye on the pastries near the end of baking to prevent burning.
- Let pastries cool slightly before serving for an optimal texture.
- Store leftovers in an airtight container to maintain freshness.
Common Mistakes to Avoid
- Using cold cream cheese: This can result in lumps in the filling and a less smooth texture. Always make sure it is softened for better blending.
- Overfilling the pastries: Filling too much can cause the pastries to burst during baking. Use a moderate amount of filling to keep them intact.
- Not sealing edges properly: If the corners aren’t pinched tightly, filling can leak out. Make sure to press well to avoid any leaks.
- Underbaking the pastries: This can lead to a soggy texture. Keeping an eye on the color will help ensure they’re baked properly.
- Skipping the egg wash: Not applying the egg wash can result in pale pastries. A light brush gives that lovely golden brown finish.
- Using dull knives to cut pastry: A dull knife can crush the delicate layers of puff pastry. Use a sharp knife for clean cuts.
Variations & Substitutions
For a twist on the filling, consider using different pie fillings, such as blueberry or apple, based on personal preference. You can also infuse the cream cheese filling with spices like cinnamon or nutmeg for an additional flavor layer. For a lighter version, consider reducing the amount of sugar slightly.
Storage & Reheating
To store, keep the Cherry Cheese Danish at room temperature in an airtight container for up to two days. For longer storage, place them in the refrigerator, where they can last about five days. If freezing, wrap them tightly in plastic wrap and then in foil. To reheat, place them in a warm oven until heated through, which helps preserve the flaky texture.
Frequently Asked Questions
Can I make this recipe ahead of time?
Yes, you can prepare the cream cheese filling and assemble the danishes ahead of time. Store them in the refrigerator until you’re ready to bake. This helps save time when you want to enjoy them fresh.
How long does it last in the fridge?
Leftover Cherry Cheese Danishes can be stored in the refrigerator for up to five days. Make sure they are in an airtight container to keep them fresh and flavorful.
Can I freeze this recipe?
Yes, you can freeze the assembled but unbaked pastries. Wrap them tightly in plastic wrap and foil and store them in the freezer. Bake from frozen, just adding a few extra minutes to the cooking time.
What can I substitute for one ingredient?
If you don’t have ricotta cheese, you could use mascarpone or additional cream cheese for a similar creamy texture. Just ensure the total creaminess remains balanced for the filling.
Why didn’t my recipe turn out as expected?
Common reasons include using cold ingredients, which can affect texture, or overfilling the pastries. Ensuring everything is well-measured, sealed, and baked correctly will help you achieve the best results.
Final Thoughts
Making Cherry Cheese Danish is a rewarding culinary experience that combines simple ingredients and straightforward techniques. The anticipation of biting into a flaky pastry filled with rich cream cheese and sweet cherries is delightful. Enjoying them fresh from the oven or at your own pace allows for a satisfying treat any time of day. This recipe is a gentle reminder that comfort food can also be approachable.

Cherry Cheese Danish
Ingredients
Cheese Filling
- 4 oz Cream Cheese, softened provides creaminess
- 1/4 cup Sugar adds sweetness
- 1 large Egg Yolk binds ingredients together
- 1 tbsp Ricotta Cheese adds richness
- 1/2 tsp Almond Extract or vanilla extract adds flavor
- 1 pinch Salt enhances flavor
- 1/2 tbsp Lemon Zest adds brightness
Pastry
- 2 sheets Puff Pastry (1 box) provides flaky texture
- 1 can Cherry Pie Filling adds sweetness and moisture
- 1 large Egg for egg wash
- 1 tbsp Water for egg wash
- Flour for dusting prevents sticking
Instructions
Preparation
- In a mixing bowl, combine the softened cream cheese, sugar, and egg yolk. Whisk until smooth and creamy.
- Add the ricotta, almond or vanilla extract, pinch of salt, and lemon zest. Stir gently until the mixture is smooth and fluffy.
- Dust your work surface lightly with flour.
- Unroll the puff pastry sheets on the floured surface and roll them out gently if necessary.
- Cut each sheet into 4x4 inch squares.
Filling
- Place a generous spoonful of the cream cheese mixture in the center of each pastry square.
- Top with a spoonful of cherry pie filling.
Sealing and Baking
- Fold the corners of each pastry square toward the center and pinch to seal.
- Beat the large egg with 1 tablespoon of water and brush the mixture over the tops of the pastries.
- Place filled pastries on a baking sheet lined with parchment paper.
- Bake in the preheated oven at 400°F until puffed and golden brown, about 20-25 minutes.
- Remove from oven and let cool for a few minutes before serving.


