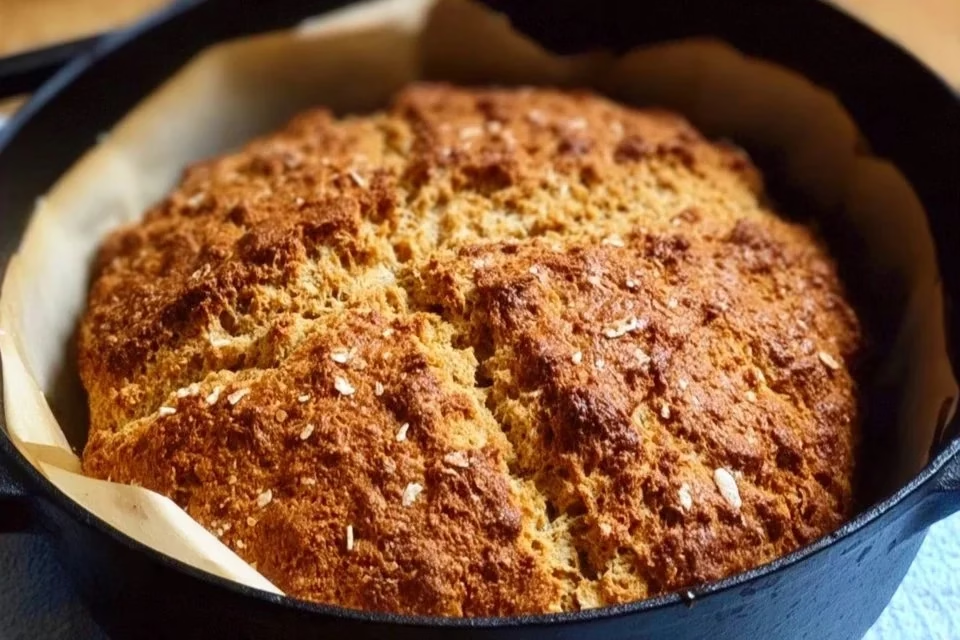
There’s something calming about the process of making bread at home, especially something as simple and hearty as brown soda bread. It’s the kind of dish that pairs well with a variety of meals or stands alone as a comforting snack. Whether enjoyed on a weeknight, among friends during gatherings, or during quiet moments on the weekend, this recipe offers a sense of comfort with its straightforward ingredients and preparation. A humble choice that delivers reliable results, this Irish brown soda bread invites you into the kitchen to create something warm and nourishing.
Why You’ll Love This Recipe Irish Brown Soda Bread (Dutch Oven Recipe)
This Irish brown soda bread recipe is valued for its ease and reliability, making it a go-to option for both novice and experienced bakers. With a balanced flavor profile contributed by the oats and brown sugar, it is a comforting addition to any meal. The practical elements of this recipe ensure that it fits seamlessly into everyday life, providing a delicious homemade option whenever you want something warm and satisfying.
Kitchen Tools You’ll Need
- Dutch oven
- Mixing bowl
- Wooden spoon or spatula
- Measuring cups and spoons
- Clean countertop or board for kneading
Ingredients
- 1 1/2 – 1 3/4 cups of buttermilk (adds moisture and tenderness)
- 1 1/2 cups oats (old fashioned) (provides nutty flavor and texture)
- 1 1/2 cup whole wheat flour ((if you don’t have whole wheat flour you can substitute all-purpose white flour)) (offers wholesome texture and flavor)
- 1 cup All-purpose flour (gives structure and lightness)
- 1/4 cup brown sugar packed (adds sweetness and enhances flavor)
- 1 tsp baking soda (acts as a leavening agent)
- 1 tsp salt (enhances overall flavor)
 1")
How to Make Irish Brown Soda Bread (Dutch Oven Recipe)
Step 1. Begin by measuring the oats and placing them into a mixing bowl. This will be the foundation of your bread, providing both texture and nourishment. Make sure to use old-fashioned oats for the best results, as they create a pleasing chewiness in the final product.
Step 2. Next, incorporate the whole wheat flour and all-purpose flour into the oats. This combination contributes to the bread’s hearty nature and rustic flavor. Gently mix the flours with the oats until evenly combined, ensuring that there are no dry patches left.
Step 3. In a separate bowl, combine the baking soda and salt. This step is crucial, as it ensures that the leavening agent is evenly distributed throughout the dry ingredients. Use a whisk or fork to mix these together lightly; this will help avoid any clumping in your final dough.
Step 4. Gradually add the baking soda and salt mixture to the flour and oats mixture. Stir with a wooden spoon or spatula until the dry ingredients are well incorporated. Look for a uniform mixture, with no visible dry or wet spots, which indicates that it’s ready for the next ingredient.
Step 5. Slowly pour in the brown sugar, mixing until it’s evenly distributed. The brown sugar not only sweetens the dough but also has a depth of flavor that complements the whole wheat and oats nicely. Continue to mix until the sugar is fully blended throughout the dry ingredients.
Step 6. Begin adding the buttermilk gradually into the mixed dry ingredients. Start with around 1 1/2 cups and adjust as needed. The buttermilk will add moisture, making your dough easier to work with. Mix until a wet, sticky dough forms, being careful not to overmix, as this could affect the final texture.
Step 7. Once the dough has come together, pour it onto a lightly floured surface. It will be sticky, so you may want to dust your hands with flour as you handle it. Knead it gently for about a minute, just enough to bring the dough into a cohesive ball without overworking it.
Step 8. Form the dough into a round loaf. When shaping, use a gentle touch, as too much pressure can compress the airy structure you’re aiming for. Place the formed loaf into the preheated Dutch oven, which will help create a wonderful crust during the baking process.
Step 9. Using a sharp knife, make a shallow cross on the top of the dough. This traditional cut allows the bread to expand while baking and adds a rustic charm. It also helps ensure even cooking throughout the loaf.
Step 10. Cover the Dutch oven with its lid and place it in the oven. This step is essential as it traps steam, creating a moist environment that contributes to the bread’s texture. Bake covered for the required time, ensuring the loaf rises properly.
Step 11. After the baking time, carefully remove the lid. This will allow the bread to develop a golden-brown crust. Bake it for an additional few minutes without the lid to achieve that lovely color and texture on the outside while cooking through on the inside.
Step 12. Once the bread is beautifully browned and sounds hollow when tapped on the bottom, carefully remove it from the Dutch oven and allow it to cool on a wire rack. This cooling period helps to set the texture and makes slicing easier.
 2")
Serving Suggestions
Irish brown soda bread is incredibly versatile and can be enjoyed in various ways. For breakfast, a thick slice spread with butter or jam can be delightful. It also works well as an accompaniment to soups or stews, providing a hearty contrast to warm dishes. As a snack, it can be enjoyed plain or with some cheese for an easy bite. Leftovers can be toasted for lunch or dinner, making it just as enjoyable the next day as when it was first baked.
Pro Tips for Best Results
- Use fresh ingredients: Fresh baking soda and flour can make a noticeable difference in the rise and texture of the bread.
- Don’t overmix: Mixing just until combined ensures a tender crumb; overmixing can lead to denser bread.
- Adjust buttermilk carefully: If your dough feels too dry, add a little extra buttermilk a tablespoon at a time until you achieve the desired consistency.
- Monitor the dough’s texture: It should be sticky, but still able to hold its shape when formed into a ball.
- Let the bread cool: Allowing it to cool completely before slicing helps maintain its structure and prevents it from becoming gummy.
- Store properly: Wrap the bread in a clean towel to keep it fresh for longer.
Common Mistakes to Avoid
- Using expired ingredients: Expired baking soda won’t provide the needed leavening, resulting in a dense bread. Always check dates before using.
- Not measuring accurately: Inaccurate measurements can lead to dry or overly wet dough. Use proper measuring cups and spoons for the best results.
- Overworking the dough: Excessive kneading or mixing can develop gluten too much, leading to a tough loaf instead of a tender one.
- Skipping the cooling step: Cutting the bread too soon can make it gummy. Be patient and let it cool fully before slicing.
- Incorrect oven temperature: An oven that’s too hot or not hot enough can lead to uneven baking. Familiarize yourself with your oven’s performance for optimal results.
- Not checking for doneness: Tapping the bread or checking its internal temperature is essential to ensure it’s baked through. Relying solely on visual cues can be misleading.
Variations & Substitutions
While this recipe is delicious as is, there are practical variations you might consider: adding seeds like sunflower or pumpkin for texture, or incorporating nuts for added flavor. You can also experiment with spices, such as cinnamon or nutmeg, to give the bread a different twist. If you’re looking for a lighter version, you could replace a portion of the whole wheat flour with all-purpose flour, keeping the same basic structure while changing the flavor profile slightly.
Storage & Reheating
For room-temperature storage, wrap the bread in a clean kitchen towel. This helps maintain its moisture while allowing it to breathe. For longer storage, place it in an airtight container or freeze it for up to three months. To reheat, slice the bread and toast it lightly in a toaster or oven, which will help retain its texture. Reheating in the oven for a few minutes also revives the crust, making it just as delightful as when first baked.
Nutrition Information
Calories: 150 Total Fat: 3g Saturated Fat: 0.5g Carbohydrates: 28g Fiber: 3g Sugar: 6g Protein: 5g Sodium: 200mg
Frequently Asked Questions
Can I make this recipe ahead of time?
Yes, you can prepare the dough a day in advance and shape it. Keep it covered in the refrigerator, then bake it fresh when you’re ready to enjoy it. This way, you’ll have freshly baked bread without needing extensive time in the kitchen.
How long does it last in the fridge?
If stored properly in an airtight container, the bread can last in the refrigerator for about five days. However, it’s usually best enjoyed fresh to fully appreciate its texture and flavor.
Can I freeze this recipe?
Absolutely! To freeze, wrap the cooled loaf tightly in plastic wrap or foil, then place it in a resealable bag. It can be stored in the freezer for up to three months. Thaw it at room temperature when you’re ready to enjoy.
What can I substitute for one ingredient?
If you don’t have whole wheat flour, you can use all-purpose white flour as a substitute in this recipe. This will slightly alter the flavor and texture but will still yield a delicious bread.
Why didn’t my recipe turn out as expected?
Common reasons include using old ingredients, not measuring properly, or overmixing the dough, which can lead to a tough texture. Ensuring freshness and measuring accurately will help achieve better results next time.
Final Thoughts
Making Irish brown soda bread is a straightforward process that invites individuals into the comforting practice of baking. With its hearty texture and balanced flavors, it’s a rewarding endeavor that enhances any meal. Enjoying the warm, fragrant bread straight from the oven provides a sense of satisfaction. The ease of this recipe ensures that it can be revisited time and again, making it a staple in your regular cooking routine. Each slice brings a little warmth to the table, encouraging moments of togetherness.
 3")
Irish Brown Soda Bread
Ingredients
Dry Ingredients
- 1.5 cups Old fashioned oats Provides nutty flavor and texture
- 1.5 cups Whole wheat flour Can substitute with all-purpose flour
- 1 cup All-purpose flour Gives structure and lightness
- 1/4 cup Brown sugar Packed, adds sweetness and enhances flavor
- 1 tsp Baking soda Acts as a leavening agent
- 1 tsp Salt Enhances overall flavor
Wet Ingredients
- 1.5-1.75 cups Buttermilk Adds moisture and tenderness
Instructions
Preparation
- Measure the oats and place them into a mixing bowl.
- Incorporate the whole wheat flour and all-purpose flour into the oats, mixing until evenly combined.
- In a separate bowl, combine the baking soda and salt, and mix lightly.
- Gradually add the baking soda and salt mixture to the flour and oats mixture, stirring until well incorporated.
- Pour in the brown sugar and mix until evenly distributed.
- Slowly add the buttermilk, mixing until a wet, sticky dough forms.
- Transfer the dough onto a lightly floured surface and knead gently for about a minute.
- Form the dough into a round loaf and place it into a preheated Dutch oven.
- Make a shallow cross on the top of the dough using a sharp knife.
Baking
- Cover the Dutch oven with its lid and bake in the oven.
- After the baking time, remove the lid and bake for additional minutes to develop a golden-brown crust.
- Once browned and sounds hollow when tapped, remove from the Dutch oven and cool on a wire rack.