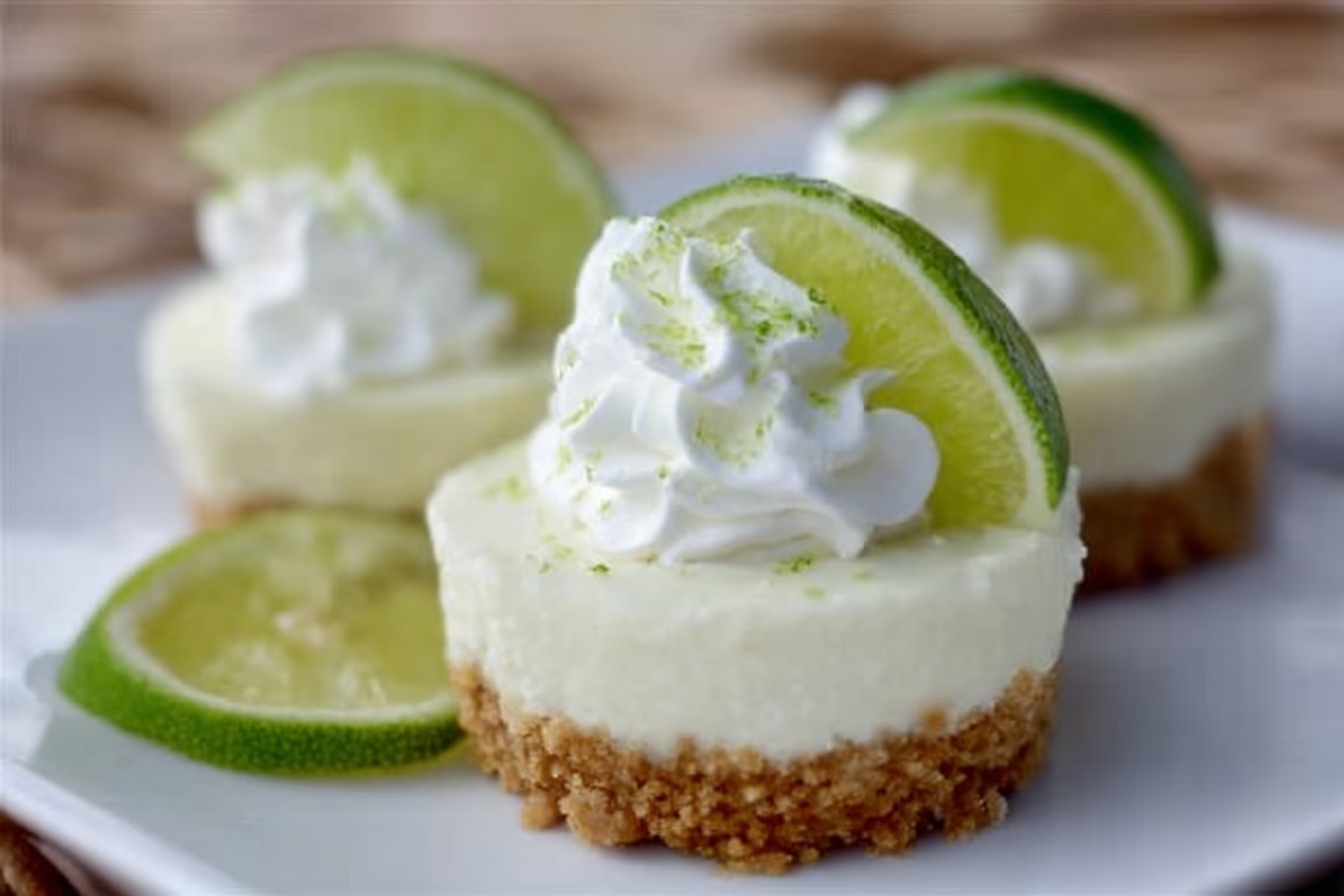
There’s something wonderfully simple about a mini dessert that offers a burst of flavor. This Mini Key Lime Pie is a delightful treat, perfect for after a long day or when you want to treat yourself on a quiet weekend. It’s also a lovely addition to gatherings where you want to bring something easy yet impressive. With its creamy filling and a crunchy crust, it strikes the right balance between comfort and refreshment. This recipe lets you step into the kitchen with confidence, knowing that a little effort yields a sweet reward.
Why You’ll Love This Mini Key Lime Pie
The ease of this Mini Key Lime Pie makes it a reliable dessert for any occasion. With its balanced flavors of tartness and sweetness, it brings comfort without being overly rich. The practical aspect of preparing these mini pies ensures you can whip them up anytime, whether for a family meal or just a cozy night in.
Kitchen Tools You’ll Need
- Mixing bowl
- Whisk
- 9-inch pie dish or individual tart pans
- Rubber spatula
- Measuring cups and spoons
Ingredients
- 3/4 cup graham cracker crumbs, crushed (about 12 squares) (provides a crunchy texture)
- 1 1/2 tablespoons sugar (adds sweetness)
- 2 tablespoons butter (helps bind ingredients together)
- 2 egg whites, beaten (adds structure and lightness)
- 1 (14 oz) can sweetened condensed milk (creates a creamy consistency)
- 1/3 cup key lime juice (provides tartness)
- 3 tablespoons nonfat Greek yogurt (adds creaminess and slight tang)
- Whipped cream (for topping)

How to Make Mini Key Lime Pie
Step 1. Begin by preheating your oven to a moderate temperature. This first step helps create a pleasant environment for your pie as it bakes, leading to a nicely set filling.
Step 2. In a mixing bowl, combine the graham cracker crumbs and sugar. Your goal here is to incorporate the sugar evenly with the crumbs, which will enhance the overall sweetness of the crust.
Step 3. Melt the butter, then add it to the crumb mixture. Mix everything together until the crumbs are coated and resemble wet sand. This creates a cohesive crust that will hold its shape after baking.
Step 4. Press the mixture firmly into the bottom and up the sides of your pie dish or tart pans. Use the backside of a measuring cup or your fingers to ensure an even layer. This forms a stable base for the filling.
Step 5. Place the crust in the preheated oven and bake until it’s slightly golden and fragrant. You’ll know it’s ready when it feels firm to the touch, which will help it maintain its structure once you add the filling.
Step 6. While the crust cools, in a separate bowl, beat the egg whites until soft peaks form. This adds an airy texture to the filling, giving it that lightness characteristic of a good pie.
Step 7. To the same bowl, add the sweetened condensed milk and key lime juice. Gently fold these ingredients into the beaten egg whites, being careful not to deflate them too much. This step is key for incorporating flavors while maintaining a light consistency.
Step 8. Next, add the Greek yogurt, folding it into the mixture as well. This introduces creaminess without weighing it down, resulting in a filling that’s both tangy and rich.
Step 9. Pour the filling into your prepared crust, smoothing the top with a spatula. This ensures an even layer that will set nicely while baking.
Step 10. Return the pie to the oven and bake until the filling is set. Look for slight firmness in the center, indicating that it’s fully cooked yet still creamy.
Step 11. After removing it from the oven, allow the pie to cool at room temperature. This helps the filling to stabilize further and makes it easier to slice cleanly.
Step 12. Chill the pie in the refrigerator for a few hours. This cooling period enhances the flavors and allows the filling to achieve the perfect consistency.
Step 13. Before serving, top each portion with was whipped cream for added richness and garnish. This not only enhances the presentation but adds another layer of flavor to each bite.
Serving Suggestions
Mini Key Lime Pie is versatile enough for various occasions. It makes a cheerful addition to breakfast, offering a sweet start to your day. As a snack, it can satisfy those mid-afternoon cravings. During family meals, it can serve as a refreshing dessert that everyone will enjoy. Leftovers—if there are any—can be a delightful treat later in the week, retaining their flavor and texture when stored properly.
Pro Tips for Best Results
- Use fresh key lime juice for a more vibrant flavor rather than bottled juice. It really enhances the pie’s tartness.
- Take care to let the pie cool completely before refrigerating; this helps set the filling more effectively.
- When folding the egg whites, be gentle to retain as much air as possible, which contributes to the light texture of the filling.
Common Mistakes to Avoid
- Skipping the crust-baking step: If you don’t bake the crust, it may be too crumbly and won’t hold together well once the filling is added. Always bake until it is slightly golden.
- Using warm or hot crust: If you add the filling to a hot crust, it can make the filling melt rather than set. Allow your crust to cool completely.
- Overmixing the filling: When combining the ingredients, be careful not to overmix after adding the egg whites. Overmixing can deflate the airiness essential for a light filling.
- Not chilling enough: Serving the pie too soon can result in a filling that is too soft to slice neatly. Give it ample chilling time.
- Neglecting to taste: Always taste your filling before pouring it into the crust. If it feels too tart, it might need a bit more sweetness adjusted to your preference.
- Skipping the whipped cream: This topping isn’t just for looks; it balances the pie’s tartness and adds a lovely creaminess. Don’t skip it!
Variations & Substitutions
For a twist on the classic flavor, consider using a coconut crust in place of the graham cracker crust. You can also add a hint of zest to the filling by incorporating a bit of lime zest for an extra citrus kick. If you prefer a lighter option, consider using reduced-fat whipped topping instead of traditional whipped cream.
Storage & Reheating
This pie is best stored in the refrigerator, where it will remain fresh for up to three days. Make sure it is covered to maintain its moisture. Unfortunately, this pie doesn’t freeze well due to the texture of the filling, which may become grainy after thawing. Simply enjoy it chilled from the fridge for the best experience.
Frequently Asked Questions
Can I make this recipe ahead of time?
Absolutely. The Mini Key Lime Pie can be made a day ahead. Just ensure it’s refrigerated properly to retain its flavor and texture.
How long does it last in the fridge?
When stored properly, the pie will last up to three days in the refrigerator. It’s best to cover it to prevent drying out.
Can I freeze this recipe?
Freezing is not recommended for this pie, as the filling’s texture can change negatively when thawed.
What can I substitute for one ingredient?
If you’re out of Greek yogurt, you might try sour cream for a similar creamy tang in the filling.
Why didn’t my recipe turn out as expected?
Common issues arise from not allowing the pie to cool or set properly. Ensure the crust cools and the pie chills in the fridge before serving.
Final Thoughts
Making a Mini Key Lime Pie can be a calming and rewarding experience. The process is straightforward and enjoyable, and the end result is a refreshing dessert that feels indulgent without being overwhelming. Enjoy the little moments of delight as you share it, and remember, the effort you put into the recipe makes each bite even sweeter.

Mini Key Lime Pie
Ingredients
For the crust
- 3/4 cup graham cracker crumbs, crushed (about 12 squares, provides a crunchy texture)
- 1 1/2 tablespoons sugar (adds sweetness)
- 2 tablespoons butter (helps bind ingredients together)
For the filling
- 2 egg whites, beaten (adds structure and lightness)
- 1 can sweetened condensed milk (14 oz) (creates a creamy consistency)
- 1/3 cup key lime juice (provides tartness)
- 3 tablespoons nonfat Greek yogurt (adds creaminess and slight tang)
- Whipped cream (for topping)
Instructions
Preparation
- Begin by preheating your oven to a moderate temperature.
- In a mixing bowl, combine the graham cracker crumbs and sugar.
- Melt the butter, then add it to the crumb mixture. Mix until the crumbs are coated and resemble wet sand.
- Press the mixture firmly into the bottom and up the sides of your pie dish or tart pans.
- Place the crust in the preheated oven and bake until slightly golden and fragrant.
Filling
- While the crust cools, beat the egg whites until soft peaks form.
- To the egg whites, add the sweetened condensed milk and key lime juice. Gently fold these ingredients together.
- Add the Greek yogurt and fold it into the mixture.
- Pour the filling into your prepared crust, smoothing the top with a spatula.
- Return the pie to the oven and bake until the filling is set.
- After removing it from the oven, allow the pie to cool at room temperature.
- Chill the pie in the refrigerator for a few hours.
- Before serving, top each portion with whipped cream.