
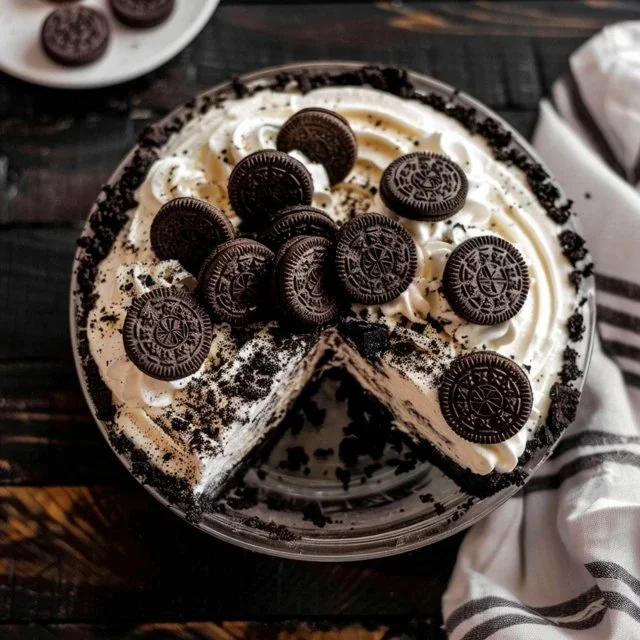
There’s something wonderful about gathering around a dessert that everyone can enjoy. This Gluten-free Dairy-free No-bake Oreo Pie fits the bill perfectly. It’s an easy dish that works well for weeknight treats, special gatherings, or simply when you want to indulge a little. The combination of flavors and textures—creamy, crunchy, and rich—makes it a comforting choice. Plus, it’s adaptable for various diets, bringing a satisfying dessert option to the table. Let’s dig in and see how to make this delightful pie.
Why You’ll Love This Recipe Gluten-free Dairy-free No-bake Oreo Pie
This recipe offers a seamless balance of ease and reliability, making it a go-to for many home cooks. It combines the comforting flavor of Oreos with a creamy filling while being gentle on dietary restrictions. The Gluten-free Dairy-free No-bake Oreo Pie is perfect for a variety of occasions, whether you need a quick dessert for a family meal or a sweet snack during the day.
Kitchen Tools You’ll Need
- Mixing bowl
- Measuring cups
- Whisk
- 9-inch pie pan
Ingredients
- 30 Gluten-free Oreos (for the crust, adding crunch and flavor)
- 12-ounce package regular Oreos (not double-stuffed) or 2 boxes Simple Mills Chocolate Sandwich Cookies for Paleo (for flavor and texture)
- 1/3 cup vegan butter (melted, can sub ghee or coconut oil) (provides moisture and helps bind the crust)
- 2 13.66-ounce cans full-fat unsweetened canned coconut cream (room temperature) (brings creaminess and richness)
- 1/3 cup honey (adds sweetness and helps set the filling)
- 3 tablespoons powdered gelatin or 4 0.25 individual packets (helps the filling set)
- 1 teaspoon vanilla or mint extract (if making mint variation) (enhances flavor)
- 16 Gluten-free Oreos (or Simple Mills Chocolate Sandwich Cookies for Paleo) (adds an additional layer of flavor and texture)

How to Make Gluten-free Dairy-free No-bake Oreo Pie
Step 1. Start by preparing the crust. In a mixing bowl, combine the 30 Gluten-free Oreos and the 12-ounce package of regular Oreos or Simple Mills Chocolate Sandwich Cookies. Use a food processor or crush them finely using a rolling pin until they resemble fine crumbs. This will create a solid basis for your pie, contributing a rich chocolate flavor and a satisfying crunch.
Step 2. Once the cookies are crushed, pour in the melted vegan butter and mix until all the crumbs are moistened. The texture should be similar to damp sand, allowing it to hold together when pressed. This mixture will form the crust, so ensure the crumbs are well combined with the melted butter for a consistent texture throughout.
Step 3. Transfer the crumb mixture into a 9-inch pie pan. Press it firmly into the bottom and up the sides using your fingers or the bottom of a measuring cup to create a solid crust. It’s important that the crust is compact, as this will help it hold its shape when the pie is sliced.
Step 4. After creating the crust, it’s time to prepare the filling. In a separate bowl, whisk together the two cans of full-fat unsweetened coconut cream and the 1/3 cup of honey until well combined. The mixture should be smooth and creamy, showcasing the coconut cream’s natural richness, which will provide a luscious texture to the filling.
Step 5. Next, sprinkle the powdered gelatin over the coconut cream mixture. Allow it to sit for a few minutes until it blooms. This step is important as it ensures the gelatin will dissolve properly, contributing to the pie’s structure without any lumps. The filling should remain silky when properly combined.
Step 6. Once bloomed, gently whisk the gelatin into the filling until fully incorporated. The mixture will thicken slightly, which is a sign that the gelatin is interacting with the cream. This step contributes to the satisfying texture of the filling once the pie sets.
Step 7. If you’re opting for the mint version, stir in the 1 teaspoon of vanilla or mint extract now. This flavor addition will enhance the overall profile of the pie while blending well with the chocolatey elements. If you prefer the classic flavor, you can skip this step.
Step 8. Fold in the 16 additional Gluten-free Oreos, chopped into smaller pieces, into the filling mixture. This will distribute chunks of cookie throughout the creamy layer, adding extra flavor and texture to each slice. Stir gently to avoid breaking up the cookie pieces too much.
Step 9. Pour the filling mixture into the prepared crust, using a spatula to spread it evenly. Smooth the top to create a pleasing presentation. The filling should be spreadable yet thick, holding its shape as you work with it. This final layer will balance the crunchy crust beautifully when set.
Step 10. Chill the assembled pie in the refrigerator for at least 4 hours, or until firm. The cooling time is crucial, as it allows the gelatin to set properly and gives the pie a nice sliceable texture. Check to ensure the filling is solid but still has a creamy sheen before serving.

Serving Suggestions
This pie is a versatile treat that serves well across various occasions. It makes for an enjoyable breakfast paired with coffee or tea and is ideal for after-school snacks. You can serve it at family meals, cutting into slices that showcase its layers. Leftover pie can be a delightful end to any day, offering a creamy, satisfying bite straight from the fridge.
Pro Tips for Best Results
- Ensure the coconut cream is at room temperature for easier mixing and smoother consistency.
- Press the crust firmly into the pan to avoid crumbling when slicing the pie.
- For a more intense chocolate flavor, opt for darker cookie options when choosing your Oreos or alternatives.
- Allow enough chilling time; the longer it sets, the better it holds together.
- Using chilled mixing bowls can help keep the filling smooth.
- Be cautious with the amount of honey; you can adjust to taste, but keep in mind it also helps the filling set.
Common Mistakes to Avoid
- Not blooming the gelatin properly: This can lead to clumps in the filling, preventing it from setting smoothly. Always allow it to sit and hydrate before adding it to the mixture.
- Overmixing the coconut cream: Whisking too vigorously can incorporate air, making the filling light but less creamy. Mix just until combined for the best texture.
- Under-pressing the crust: If the crust isn’t compact, it may crumble when sliced. Make sure to press it down firmly and evenly.
- Using cold coconut cream: Cold cream doesn’t blend well with the other ingredients, affecting the filling’s smoothness. Room-temperature cream is best.
- Skipping the chilling step: Serving the pie too early can cause it to fall apart and lose its structure. Patience is key for the right texture.
- Ignoring the variations: Not adjusting the flavoring extracts can lead to a one-note dessert. Don’t be afraid to try mint or leave it out for a classic taste.
Variations & Substitutions
Consider different extracts to add variety, such as almond or coconut. For an extra crunchy texture, you could layer additional crushed Oreos on top before chilling. If you’d like a fruitier version, try folding in fresh berries or a berry puree to the filling, paired with the crunchy crust.
Storage & Reheating
Store the pie in the refrigerator covered with plastic wrap to keep it fresh, where it will last up to five days. It can be kept at room temperature for up to an hour before serving, ideal for gatherings. If you want to preserve the pie for longer, you can freeze it. To serve, let it thaw in the fridge overnight for the best texture.
Frequently Asked Questions
Can I make this recipe ahead of time?
Yes, this pie is great for making ahead of time. It can be prepared a day or two in advance and kept in the refrigerator until serving, allowing the flavors to meld nicely as it sets.
How long does it last in the fridge?
The pie will typically last in the refrigerator for about five days. Make sure to cover it tightly to maintain freshness.
Can I freeze this recipe?
Yes, you can freeze the pie. Just make sure it is well-covered and sealed. It’s best enjoyed within a month if frozen.
What can I substitute for one ingredient?
If you don’t have honey, maple syrup can be used as a sweeter alternative, although it may slightly change the flavor profile of the filling.
Why didn’t my recipe turn out as expected?
If the pie didn’t set properly, it may be due to insufficient time in the refrigerator or inadequate blooming of the gelatin. Following the steps closely usually leads to success.
Final Thoughts
Creating a Gluten-free Dairy-free No-bake Oreo Pie is not just about the ingredients; it’s about the experience of putting it together. Each step brings you closer to a satisfying dessert that is easy to share and enjoy. Whether served on a special occasion or enjoyed quietly at home, this pie reassures with its simplicity and delightful flavor. Enjoy your creation!

Gluten-free Dairy-free No-bake Oreo Pie
Ingredients
For the crust
- 30 pieces Gluten-free Oreos For the crust, adding crunch and flavor.
- 12 ounces regular Oreos or 2 boxes Simple Mills Chocolate Sandwich Cookies for Paleo For flavor and texture.
- 1/3 cup vegan butter, melted Can substitute ghee or coconut oil.
For the filling
- 2 cans 13.66-ounce full-fat unsweetened canned coconut cream Room temperature for best mixing.
- 1/3 cup honey Adds sweetness and helps set the filling.
- 3 tablespoons powdered gelatin Or 4 individual packets.
- 1 teaspoon vanilla or mint extract Optional, for flavor.
- 16 pieces Gluten-free Oreos or Simple Mills Chocolate Sandwich Cookies for Paleo Chopped for an additional layer of flavor and texture.
Instructions
Crust Preparation
- In a mixing bowl, combine the 30 Gluten-free Oreos and the 12-ounce package of regular Oreos or Simple Mills Chocolate Sandwich Cookies, crushing them until they resemble fine crumbs.
- Pour in the melted vegan butter and mix until all crumbs are moistened.
- Transfer the crumb mixture into a 9-inch pie pan and press it firmly into the bottom and up the sides using your fingers or the bottom of a measuring cup.
Filling Preparation
- In a separate bowl, whisk together the two cans of coconut cream and the honey until smooth and creamy.
- Sprinkle the powdered gelatin over the coconut cream mixture and let sit until bloomed.
- Gently whisk the bloomed gelatin into the filling until fully incorporated.
- If using, stir in the teaspoon of vanilla or mint extract.
- Fold in the 16 chopped Gluten-free Oreos into the filling mixture.
Assembling and Chilling the Pie
- Pour the filling mixture into the prepared crust and smooth the top.
- Chill the assembled pie in the refrigerator for at least 4 hours, or until firm.


