There’s something comforting about making a sweet treat from scratch. These cake pops are an easy and enjoyable project, perfect for any occasion. Whether you find yourself whipping them up to enjoy on a quiet weekend, serving them at gatherings, or indulging in a little treat after a busy day, they bring a sense of simplicity and joy. Homemade cake pops offer the flexibility to enjoy a delightful dessert without much fuss. Let’s step into the kitchen and make these together.
Why You’ll Love This Easy Homemade Starbucks Cake Pops
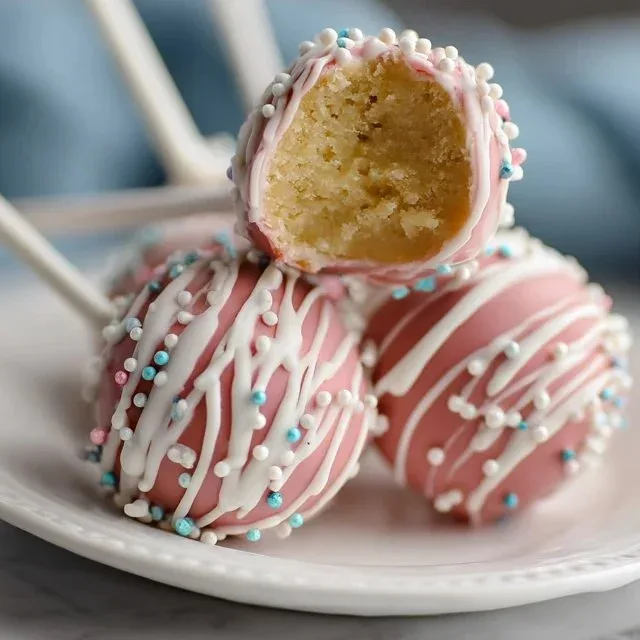
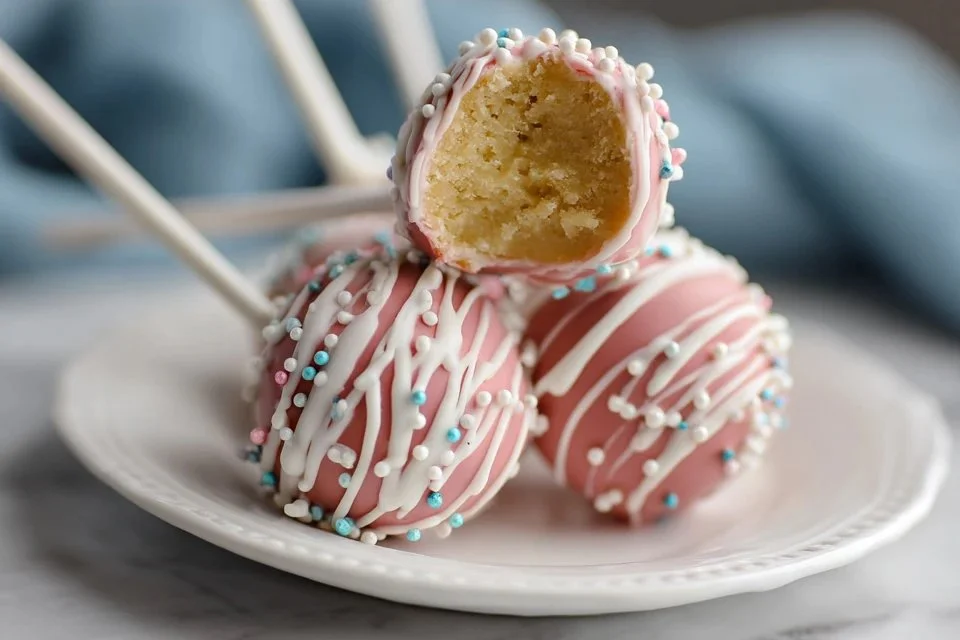
These easy homemade Starbucks cake pops are reliable and approachable, making them a great choice for any cook. The comforting flavor of vanilla cake combined with the sweetness of the chocolate coating creates a perfectly balanced treat. Plus, their practical nature means you can whip them up with just a few simple ingredients, making them an excellent addition to your baking repertoire.
Kitchen Tools You’ll Need
- Mixing bowl
- Spoon or spatula
- Baking pan
- Lollipop sticks
- Cooling rack
Ingredients
- 1 box vanilla cake mix (plus the ingredients on the back)
- 1/4 cup powdered sugar (adds sweetness and structure)
- 1/2 tsp vanilla extract (enhances the flavor)
- 12 oz light pink color melts (provides a smooth coating)
- White nonpareils sprinkles (adds texture and visual appeal)
- 24 lollipop sticks (for holding the cake pops)

How to Make Easy Homemade Starbucks Cake Pops
Step 1. Begin by preparing the vanilla cake mix according to the instructions on the box. This typically involves combining the mix with eggs, oil, and water, then mixing until smooth. Be sure to follow the specific ratios indicated. Once mixed, pour the batter into a baking pan, spreading it evenly. After baking, check for doneness by inserting a toothpick into the center; it should come out clean.
Step 2. Once the cake is fully baked, allow it to cool completely. This is important, as a warm cake may crumble or create a mess during the next steps. After cooling, crumble the cake into a large mixing bowl until it’s a fine consistency. You’re looking for a texture similar to sand, which will help the pops hold together later on.
Step 3. Add the powdered sugar and vanilla extract to the crumbled cake in the bowl. Mix these in thoroughly until everything is well combined. The mixture should be slightly moist but still hold its shape when pressed. This ensures your cake pops will be sweet but not overly sugary.
Step 4. Once combined, form the mixture into small balls, about the size of a tablespoon. Gently roll them in your hands to ensure they’re compact. Place the formed balls onto a baking sheet lined with parchment paper. They should be firm enough to stand on their own but still soft in the center.
Step 5. Once you’ve shaped all the cake balls, insert a lollipop stick into each one, pushing it about halfway through. This will help stabilize the cake pops for the next step. After inserting the sticks, place the tray in the refrigerator for about 30 minutes. Chilling them will help them maintain their shape when dipped in the coating.
Step 6. While the cake balls chill, melt the light pink color melts according to the package instructions. Stir until the melts are completely smooth, with no lumps remaining. This will create a lovely coating that adds both flavor and a shiny finish to your cake pops.
Step 7. Once the cake balls have chilled, it’s time to dip. Remove them from the refrigerator and carefully dip each one into the melted pink coating. Use a gentle swirling motion to ensure they are fully covered, allowing any excess to drip back into the bowl. Make sure to coat them evenly for the best appearance.
Step 8. After dipping, immediately sprinkle the white nonpareils on top of the pops before the coating hardens. This adds a nice crunch and visual contrast. Place the coated cake pops upright in a block of foam or a cake pop stand to allow them to set completely. Watching them firm up is satisfying; they’ll become sturdy and ready to enjoy.
Step 9. Allow the dipped cake pops to sit until the coating hardens fully. This could take an hour or so at room temperature. During this time, you can clean your workspace or prepare to serve these sweet treats. The pops will be set when the coating feels firm to the touch but still slightly glossy.
Step 10. Serve your homemade cake pops to family and friends or enjoy them as a sweet treat for yourself. These cake pops are perfect for any occasion, from casual snacks to festive gatherings, making them highly versatile. Enjoy the blend of textures from the moist cake and the smooth chocolate coating, and take pleasure in sharing your homemade creation.

Serving Suggestions
These cake pops can brighten up breakfast or make a delightful snack any time of day. They fit perfectly into family meals, creating smiles all around a table. Leftovers, if there are any, can be enjoyed throughout the week. Keep them handy in the fridge or on a counter for that perfect mid-afternoon pick-me-up that’s both sweet and satisfying. They’re simple yet special, allowing you to enjoy a homemade treat whenever the mood strikes.
Pro Tips for Best Results
- Be sure the cake has cooled completely before crumbling; warm cake can be too delicate to form into pops.
- When dipping, swirl gently to avoid dropping the cake balls into the coating.
- Allow the pops to chill adequately; this helps maintain the shape during the melting and dipping process.
- You can add flavor variations by mixing in a bit of cocoa powder or other flavoring extracts while mixing the crumbled cake.
- Use a dipping tool to lift the cake pops out of the coating for a cleaner finish.
- Storage is key; keep them in an airtight container to maintain freshness.
Common Mistakes to Avoid
- Not letting the cake cool completely before crumbling. This can lead to a messy mixture that’s difficult to work with. Always wait until it’s fully cooled to ensure the right texture for shaping.
- Overmixing the cake batter. Doing so can create a dense cake instead of a light, airy texture. Follow the package instructions for mixing time to maintain a fluffy cake.
- Forgetting to chill the cake balls before dipping. If you skip this step, the balls can fall apart in the melted coating. Refrigerating helps them hold their shape better.
- Dipping too quickly in the melted coating. This can result in an uneven layer. Take the time to gently dip and allow the excess to drip off for a sleek finish.
- Using old or expired cake mix. A fresh box ensures that your cake will rise properly and taste its best. Always check the expiration date before using.
- Neglecting to sprinkle while the coating is wet. Wait too long, and the sprinkles won’t stick. Always add them immediately after dipping for the best appearance.
Variations & Substitutions
If you need a change, consider experimenting with different cake mix flavors, such as chocolate or red velvet, to switch things up. You could also try using white chocolate melts for a creamier finish or drizzle contrasting chocolate on top for design. Additionally, adding a bit of mini chocolate chips or nuts to the cake mixture can provide a delightful crunch in each bite.
Storage & Reheating
Cake pops can be stored at room temperature for a day or two. For longer storage, keep them in the refrigerator, ideally in an airtight container to prevent them from drying out. If you want to save them for farther down the line, freezing is an option; simply place them in a freezer-safe container. When ready to enjoy, let them thaw in the refrigerator to maintain their texture, avoiding any reheating.
Frequently Asked Questions
Can I make this recipe ahead of time?
Absolutely! You can prepare the cake pops a day in advance. Just store them in an airtight container in the refrigerator after they’ve cooled and set. This way, they’ll be ready to serve when you need them!
How long does it last in the fridge?
These cake pops can last about 4 to 5 days in the refrigerator. Store them properly in an airtight container to keep them fresh.
Can I freeze this recipe?
Yes, you can freeze the cake pops once they are fully set. Place them in a single layer in a freezer-safe container. Thaw them in the refrigerator when you’re ready to enjoy them again.
What can I substitute for one ingredient?
If you don’t have powdered sugar, you can use granulated sugar in its place, but the texture and sweetness will vary slightly. Just be aware that granulated sugar may not dissolve as smoothly as powdered sugar.
Why didn’t my recipe turn out as expected?
Common culprits include overly warm cake when mixing, not allowing the pops to chill properly, or inconsistencies in the dipping process. Following the steps closely will help ensure better results.
Final Thoughts
Making these easy homemade Starbucks cake pops is an enjoyable process that results in delightful treats. There’s something satisfying about creating these little sweets from scratch, and they bring a touch of joy to both the cook and those who enjoy them. Embrace the journey of baking with these simple yet delicious cake pops; you’ll be pleased with the outcome.

Starbucks Cake Pops
Ingredients
For the Cake
- 1 box vanilla cake mix plus the ingredients on the back of the box
- 1/4 cup powdered sugar adds sweetness and structure
- 1/2 tsp vanilla extract enhances the flavor
For the Coating
- 12 oz light pink color melts provides a smooth coating
- white nonpareils sprinkles adds texture and visual appeal
For Assembly
- 24 sticks lollipop sticks for holding the cake pops
Instructions
Preparation
- Begin by preparing the vanilla cake mix according to the instructions on the box, typically involving combining the mix with eggs, oil, and water, then mixing until smooth. Pour the batter into a baking pan and bake until a toothpick inserted comes out clean.
- Allow the cake to cool completely. Crumble the cooled cake into a large mixing bowl until it’s a fine consistency.
- Add the powdered sugar and vanilla extract to the crumbled cake. Mix until combined, ensuring the mixture is slightly moist yet holds its shape.
- Form the mixture into small balls, about the size of a tablespoon, and place them onto a baking sheet lined with parchment paper.
- Insert a lollipop stick into each cake ball, pushing it halfway through, then refrigerate for about 30 minutes to maintain shape.
Coating
- Melt the light pink color melts according to the package instructions until completely smooth.
- Remove the chilled cake balls from the refrigerator and dip each into the melted coating, swirling gently to ensure even coverage.
- Immediately sprinkle the white nonpareils on top before the coating hardens, then place the pops upright in a foam block or cake pop stand.
- Allow the coated pops to sit until the coating hardens fully, which may take about an hour.
- Serve the cake pops to family and friends or enjoy them yourself.