Why You’ll Love This Recipe
This Easy St. Patrick’s Day Brownie Trifle is incredibly straightforward and reliable, making it an ideal choice for novice bakers as well as seasoned cooks. The combination of fudgy brownies, creamy pudding, and whipped topping brings a comforting balance in flavors and textures. With minimal effort required, this dessert adds practical value to family meals, gatherings, or even just a sweet snack at home.
Kitchen Tools You’ll Need
- Mixing bowls
- Whisk
- 8×8 baking pan
- Trifle dish or large serving bowl
- Spatula
Ingredients
- 1 box Brownie Mix (plus ingredients listed on the box for an 8×8 pan) (structure)
- 3.5 oz Instant Vanilla Pudding Mix (creaminess)
- 8 oz Cool Whip (whipped topping) (lightness)
- Few drops Green Food Coloring (color enhancement)
- Mint Oreos (crushed) (crunch and flavor)
- Optional: Pistachio pudding (instead of vanilla) (nutty flavor)
How to Make Easy St. Patrick’s Day Brownie Trifle
Step 1. Start by preparing the brownies according to the instructions on the box. Mix the required ingredients in a bowl until they’re well combined. Pour the batter into an 8×8 pan and bake as directed. Watch for the brownies to spring back slightly when touched, indicating they are settled. Let them cool completely before layering.
Step 2. While the brownies are cooling, prepare the vanilla pudding. In a separate bowl, combine the instant vanilla pudding mix with the amount of milk specified on the package. Whisk together until the mixture thickens, which should take a few minutes. Set this aside for layering later in the trifle.
Step 3. Once the brownies have cooled, cut them into squares or crumble them gently into bite-sized pieces. This texture will allow them to mix well into the layers of the trifle. Make sure the pieces are not too large, as they should blend beautifully with the other components.
Step 4. Take the crushed Mint Oreos and set them aside. This will provide a nice crunchy contrast to the creamy layers of pudding and whipped topping while also adding a minty flavor. Having them prepared and within reach will help streamline your assembly process.
Step 5. In a large serving bowl or a trifle dish, start layering your dessert. Begin with a layer of brownie pieces at the bottom. Press them lightly to create a stable base for the layers that will follow. This creates a delicious foundation and is the first step in building your trifle.
Step 6. Next, add a layer of the prepared vanilla pudding over the brownie pieces, spreading it gently but completely to cover the brownies. This pudding layer adds sweetness and smoothness, contrasting nicely with the dark brownies below.
Step 7. After the pudding layer, spoon a layer of Cool Whip over the vanilla pudding. Gently spread it out with a spatula, ensuring every corner is filled. The lightness of the Cool Whip provides a fantastic airy texture that balances the overall richness of the trifle.
Step 8. Sprinkle a generous layer of the crushed Mint Oreos over the Cool Whip. This adds both flavor and texture, enhancing the overall taste of the trifle while also contributing a delightful crunch. Let it rest for a moment to allow the flavors to meld together.
Step 9. Repeat the layering process by adding another layer of brownie pieces, followed by vanilla pudding, Cool Whip, and crushed Mint Oreos. Depending on the size of your serving dish, you can create one or two more layers. Each layer builds up the flavors and textures, resulting in a visually appealing trifle.
Step 10. Finally, finish with a light dusting of crushed Mint Oreos on top and add a few drops of green food coloring to the last layer of Cool Whip if desired. This not only enhances the festive appearance but also signals that this dessert is special for St. Patrick’s Day. Chill in the refrigerator until you’re ready to serve.
Serving Suggestions
The Easy St. Patrick’s Day Brownie Trifle makes for an excellent dessert at family gatherings or parties, impressing guests with its layers of flavor. It’s also a wonderful way to enjoy something sweet after dinner on a casual evening. If you have leftovers, it’s a great treat for breakfast or as a mid-afternoon snack. The chilled and layered nature stays appealing even after a day or two in the fridge, and it’s easy to scoop out portions to share with others.
Pro Tips for Best Results
- Be sure to let the brownies cool completely to avoid melting the layers above.
- When layering, aim for even distributions to maintain a balanced look and flavor.
- Use a spatula to spread the pudding and Cool Whip for a smoother finish.
- Experiment with more layers for a taller and more impressive trifle.
- Refrigerate for several hours before serving to allow flavors to meld.
Common Mistakes to Avoid
Not cooling the brownies completely: This can cause the layers above, like pudding and Cool Whip, to melt and blend together instead of maintaining distinct layers. Allow enough cooling time before assembly for better texture.
Using the wrong consistency of pudding: If the pudding isn’t thick enough, it won’t hold its shape between layers. Ensure you whisk the pudding long enough, following the package instructions precisely.
Overcrushing the Oreos: Crushing them too finely can lead to a powdery texture that doesn’t provide the desired crunch. Aim for small pieces instead of crumbs for the best texture contrast.
Not adjusting for size of serving dish: If using a smaller dish than an 8×8, be cautious about layering too high. It can lead to overflow and an unpleasant presentation. Choose a dish that comfortably accommodates all layers.
Skipping the green food coloring: While optional, adding it gives your trifle a festive touch. If you decide to leave it out, consider how it may impact the visual appeal of your dessert.
Rushing assembly: Taking time to layer carefully pays off in flavor and presentation. Rushed layering can lead to uneven distribution and less appealing outcomes.
Variations & Substitutions
For a twist, try substituting the vanilla pudding with pistachio pudding for a nutty flavor that complements the Oreos wonderfully. You can also mix in chocolate chips with the brownie layer for added decadence. For a lighter touch, consider using low-fat versions of the Cool Whip and pudding without compromising taste.
Storage & Reheating
To store your trifle, cover it with plastic wrap or a lid and keep it in the refrigerator. It can last about 3-4 days. Avoid leaving it at room temperature for extended periods to maintain freshness. Freezing this trifle is not recommended, as the texture of the Cool Whip and pudding may change upon thawing. It’s best enjoyed chilled and freshly assembled.
Nutrition Information
Nutrition values are estimates and may vary based on ingredients used.
Frequently Asked Questions
Can I make this recipe ahead of time?
Yes, this trifle can be made a day in advance, allowing the flavors to meld beautifully in the refrigerator. Just make sure to cover it well to prevent any drying out or absorption of other odors.
How long does it last in the fridge?
The trifle will last in the refrigerator for about 3 to 4 days when properly covered. It’s best to consume it within this timeframe for optimal flavor and texture.
Can I freeze this recipe?
Freezing is not recommended for this trifle, as the whipped topping and pudding can change consistency when thawed, compromising the dessert’s overall texture.
What can I substitute for one ingredient?
For a different flavor profile, you can use pistachio pudding instead of vanilla. This adds a delicious nutty flavor that complements the chocolate brownies and mint Oreos.
Why didn’t my recipe turn out as expected?
Common issues may arise from rushing the assembly, not allowing brownies to cool, or improperly mixing the pudding, which can lead to texture problems. Follow the steps carefully for the best results.
Final Thoughts
Making the Easy St. Patrick’s Day Brownie Trifle is a rewarding experience that results in a delicious dessert for friends and family. This layered treat is not only cheerful for holiday celebrations but is also adaptable for everyday enjoyment. Each layer provides a different flavor and texture, making it a delightful way to finish a meal. Remember, the key is in the gentle assembly of layers and allowing time for everything to meld together perfectly. Enjoy every comforting bite!

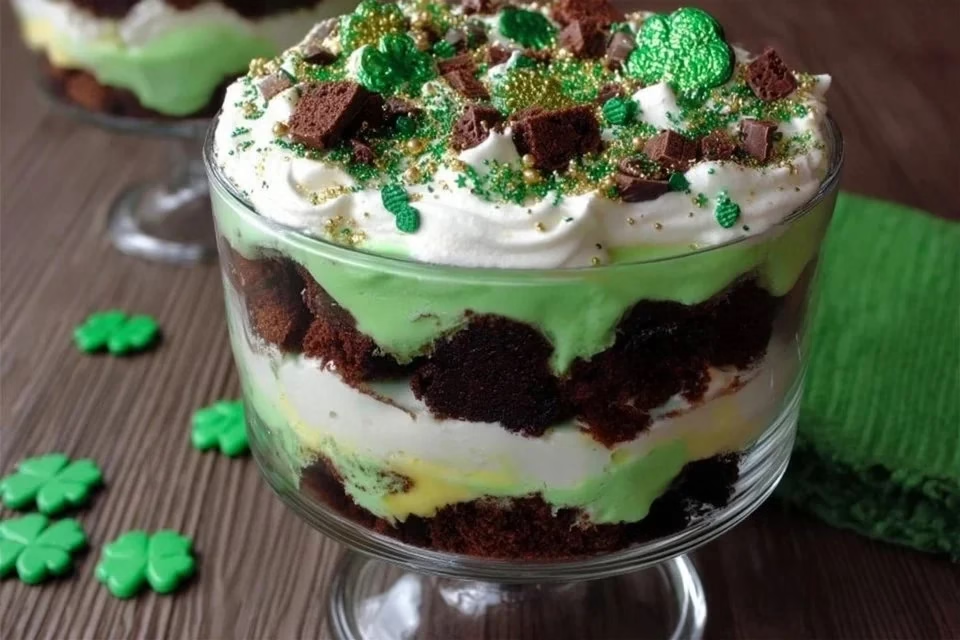
St. Patrick’s Day Brownie Trifle
Ingredients
Brownie Base
- 1 box Brownie Mix Plus ingredients listed on the box for an 8x8 pan.
Creamy Layers
- 3.5 oz Instant Vanilla Pudding Mix Provides creaminess.
- 8 oz Cool Whip Whipped topping for lightness.
- Few drops Green Food Coloring For color enhancement.
Crunchy Layer
- 1 package Mint Oreos Crushed for crunch and flavor.
Optional Variation
- 1 box Pistachio pudding Substitute for a nutty flavor.
Instructions
Preparation
- Prepare brownies according to the box instructions. Mix required ingredients and bake in an 8x8 pan.
- Let brownies cool completely before layering.
- In a bowl, mix instant vanilla pudding with milk according to package directions until thickened. Set aside.
- Cut cooled brownies into squares or crumble into bite-sized pieces.
- Crush Mint Oreos and set aside for assembly.
Assembly
- In a trifle dish or large serving bowl, layer brownie pieces at the bottom, pressing lightly.
- Add a layer of vanilla pudding over brownies, spreading it gently.
- Spoon a layer of Cool Whip over the pudding, spreading to fill corners.
- Sprinkle crushed Mint Oreos on top of Cool Whip.
- Repeat layering process until ingredients are used, finishing with a layer of Cool Whip and a dusting of Mint Oreos.
- Add green food coloring to the last layer if desired and chill in the refrigerator.


